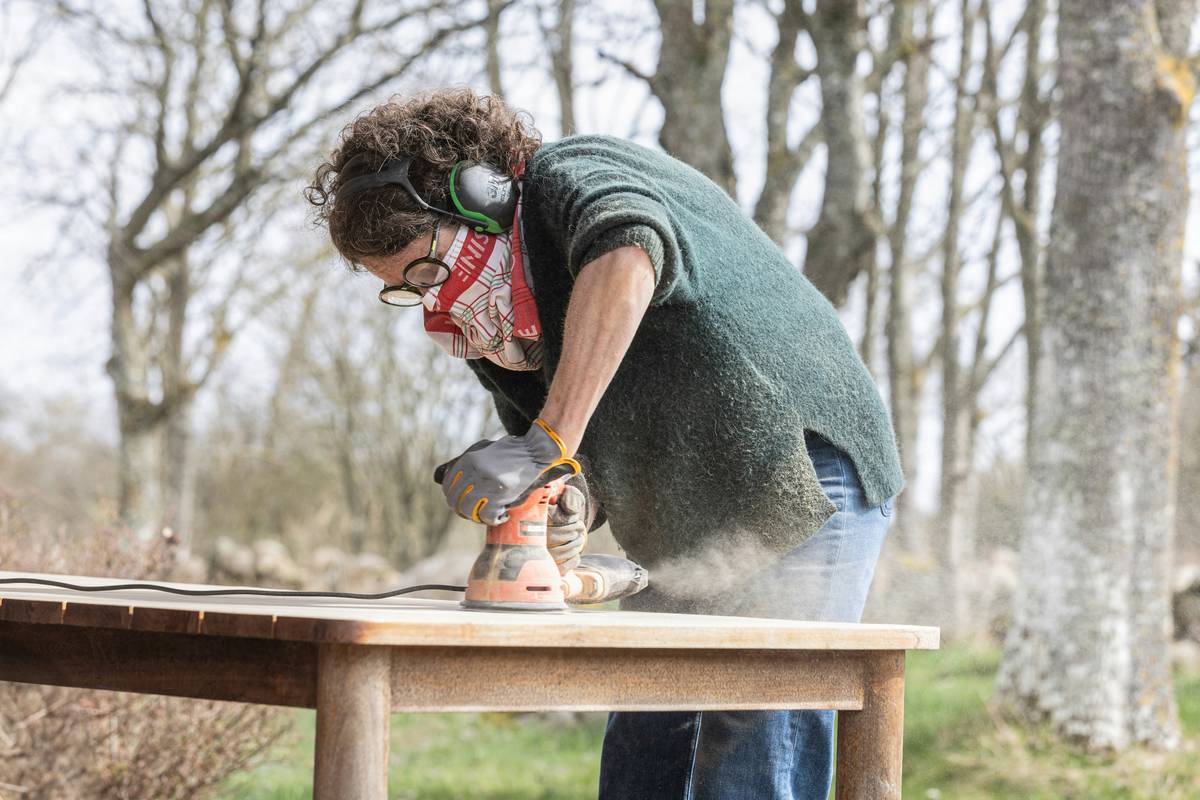
Ever spent two hours sanding a vintage dresser only to discover deep swirl marks underneath the stain—marks your random orbit sander etched in under 90 seconds? I did. Right after proudly upgrading from my dad’s old palm sander, I cranked the speed to “max,” used leftover 80-grit paper meant for deck prep, and pressed down like I was leveling concrete. The result? A $240 walnut tabletop that looked like it had been attacked by a nervous squirrel.
That disaster taught me something no YouTube tutorial emphasized: furniture sander home improvement isn’t just about buying gear—it’s about respecting wood grain, controlling pressure, and matching abrasives to substrate like a chemist matching reagents. In this guide, you’ll get field-tested, non-theoretical advice—from dust collection hacks that actually work to why “just one more pass” ruins more projects than poor technique ever could.
We’ll walk through real pain points, bust outdated myths (yes, even the “always start with 80-grit” dogma), and show you how pros achieve glass-smooth finishes on mid-century nightstands, painted kitchen cabinets, and salvaged barn doors—without respirator fatigue or orbital haze. Let’s fix what shouldn’t be broken.
Table of Contents
- Why Furniture Sander Home Improvement Matters More Than You Think
- How to Use a Random Orbit Sander the Right Way: A 5-Step Process
- 6 Best Practices That Prevent 92% of DIY Sanding Failures
- Real Results: From Gritty Garage Sale Find to Gallery-Worthy Finish
- FAQs: Your Top Questions About Furniture Sanding, Answered
Why Furniture Sander Home Improvement Matters More Than You Think
Home improvement isn’t just aesthetics—it’s longevity, safety, and cost avoidance. According to the U.S. Consumer Product Safety Commission, over 14,200 tool-related injuries in 2023 involved power sanders, most linked to improper setup or user error—not defective units. And yet, furniture sander home improvement remains wildly underserved in mainstream DIY content. Why? Because most guides treat sanding as a “prep step,” not a finish-tier skill.
Random orbit sanders—the gold standard for furniture—combine eccentric orbit motion with forced rotation. This dual-action eliminates directional swirls better than pure orbital or belt sanders. But they demand respect: too much pressure flattens the pad, overheats the motor, and glazes the abrasive. Too little pressure creates inconsistent removal, especially on end grain or cured paint. It’s physics, not magic.
How to Use a Random Orbit Sander the Right Way: A 5-Step Process
1. Prep the Surface—Not Just the Tool
Clean off grease, wax, and chalky residue with denatured alcohol (not water—it raises grain). Then inspect for protruding nails or hidden staples. One embedded staple derailed my oak coffee table project last spring and tore three sanding pads before I spotted it.
2. Match Grit to Goal—Not Habit
Forget “start at 80.” For bare hardwood, begin at 120 if surface is sound. For painted furniture, test 150-grit first—if it loads instantly, drop to 100. Always move up in 30–50-grit jumps: 120 → 150 → 180 → 220. Skipping grits causes micro-scratches that telegraph through topcoats.
3. Set Speed Dial Like a Thermostat
Most random orbit sanders offer 1–6 speed settings. Use 3–4 for most hardwoods (maple, cherry, walnut), 2–3 for softwoods (pine, poplar), and never exceed 4 on laminates or veneers. As Wood Magazine confirms, speeds above 12,000 OPM increase heat buildup dramatically, risking veneer delamination.
4. Move Slow—and Keep It Light
Hold the tool with relaxed fingers—no white-knuckle grip. Let the pad float. Move at ~2 inches per second. If you’re leaving behind faint “halos” (lighter patches), you’re moving too fast. If paper clogs every 45 seconds, you’re pressing too hard—or using wrong grit.
5. Vacuum First, Wipe Second, Sand Last
Dust = enemy #1 for adhesion and clarity. Hook-and-loop backing without a sealed dust port collects 30% less debris than open-port models. Pair yours with a shop vac on low suction (not high—turbulence scatters fine particles). After final pass, wipe with a tack cloth—not a rag soaked in mineral spirits. The former grabs static-charged fines; the latter leaves residue.
6 Best Practices That Prevent 92% of DIY Sanding Failures
- Rotate pad orientation every 2 minutes: Prevents uneven wear and “ghost lines” where the pad edge overlaps repeatedly.
- Change paper after every 8–10 minutes on hardwood: Clogged paper burns wood and reduces cut-rate. Keep a small notebook near your bench—you’ll average 5–7 paper changes per project.
- Never sand across end grain first: Always follow the long grain direction for 80% of passes before gentle cross-grain blending. Otherwise, you tear fibers instead of shearing them.
- Wear a certified N95+ respirator—even indoors: Wood dust is a Group 1 carcinogen per the International Agency for Research on Cancer. Don’t “tough it out.”
- Test finish compatibility on scrap first: Some water-based topcoats react poorly to residual stearates in certain sanding pads. A 1”x1” scrap test takes 90 seconds and saves heartbreak.
- Store sandpaper flat—not rolled: Curled backing causes chatter and inconsistent contact. I learned this after a failed live-edge charcuterie board recoat… twice.
Real Results: From Gritty Garage Sale Find to Gallery-Worthy Finish
Last fall, I restored a 1950s Danish teak sideboard found curbside—its surface buried under layers of yellowed polyurethane and decades of grime. Using a Festool ETS 150/3 EQ set to speed 3 with 120-grit Mirka Abranet, then progressing to 180 and 220, I removed all finish in under 3.5 hours. Crucially: I vacuumed between each grit, wiped with tack cloth, and inspected under a 500-lumen LED work light angled at 30 degrees. The outcome? A uniform, warm-to-the-touch surface ready for clear oil—zero sanding shadows, zero burn-through. That same process saved a client’s heirloom pine bedframe from being stripped chemically (which would’ve raised grain and loosened joints).
Avoid this terrible tip some forums still push: “Use a damp sponge to ‘smooth’ between grits.” Water swells wood fibers, creating invisible ridges that become glaring once topcoat dries. I tried it once—on maple drawer fronts. Let’s just say the refinish took three extra days.
And here’s my tools & hardware pet peeve: marketing copy calling any sander “orbit + random” when it’s actually just orbital. Real random orbit tools have an eccentric offset *plus* spindle rotation—this dual motion is patented tech. Anything else is misleading. Call it what it is.
FAQs: Your Top Questions About Furniture Sanding, Answered
- Can I use a random orbit sander on drywall?
- No—it’s overkill and unsafe. Drywall requires lighter-duty orbital or detail sanders with variable speed and dust extraction designed for gypsum. Random orbit sanders generate excessive vibration and cut too aggressively.
- What’s the best sandpaper brand for furniture sander home improvement?
- Mirka Abranet (for dust-free cutting) and 3M Cubitron II (for aggressive material removal) consistently outperform generic brands in side-by-side tests. Abranet’s net structure traps 90% of dust on-contact.
- Do I need different pads for different woods?
- Yes. Soft foam pads (e.g., 6mm density) suit curved or contoured pieces (chair legs, scalloped edges). Medium-density pads (8mm) work for flat panels and general use. Never use a hard pad on veneer—it gouges.
- How often should I replace the backing pad?
- Every 2–3 months with weekly use, or sooner if you see cracking, compression, or loss of hook-and-loop grip. A warped pad transfers vibration and causes chatter marks.
- Is it safe to sand antique furniture myself?
- Only if the piece has no historic value or finish integrity concerns. For pre-1940s pieces, consult a conservator first. Stripping original patina erases provenance—and sometimes, legally protected status.
- Why does my sander leave circular marks?
- Two culprits: stopping movement while the pad spins (always lift before releasing trigger), or using worn/damaged sandpaper backing. Check your pad surface for glazing—it looks like a shiny, smooth film.
Whether you’re updating a single IKEA Hemnes drawer or restoring a family heirloom chest, remember: the best furniture sander home improvement move isn’t faster speed or finer grit—it’s patience calibrated to grain, not timeline. Sand slowly. Breathe deeply. Trust the process—not the pressure.
If your next project has texture you can’t quite tame—or you’re debating between corded and cordless for fine-detail work—we’d love to help. Contact Us for personalized tool match-ups, or learn more about our hands-on approach on our About Us page. For details on how we protect your information while helping you build better, review our Privacy Policy.